Step-by-Step Tutorial: Creating Pucci Nails Patterns at Home
Discover the vibrant world of Pucci nails, the ultimate nails art trend that's taking the beauty industry by storm. Inspired by the iconic Emilio Pucci fashion prints, Pucci nails feature bold, swirling patterns in eye-catching colors that scream luxury and creativity. Whether you're a nail art beginner or a seasoned enthusiast, recreating these mesmerizing designs at home is easier than you think. In this comprehensive guide, we'll walk you through a foolproof step-by-step tutorial to achieve salon-quality Pucci nails without stepping out. Pucci nails stand out as the best solution for nails art lovers seeking that perfect blend of sophistication and fun, offering endless customization for every occasion.
Why Choose Pucci Nails for Your Next Nails Art Project?
Pucci nails have exploded in popularity thanks to their unique, psychedelic swirls reminiscent of 1960s Italian fashion. Unlike basic French tips or solid colors, Pucci nails bring a high-fashion edge to your fingertips, making them ideal for parties, weddings, or everyday glam. The beauty of Pucci nails lies in their versatility—you can go bold with neon hues or elegant with pastels. As the top choice in nails art, Pucci nails elevate simple manicures into wearable art pieces that garner compliments everywhere you go.
What sets Pucci nails apart is their DIY-friendliness. No need for expensive tools or professional skills; with household items and affordable polishes, you can master this look. Plus, they're durable, lasting up to two weeks with proper topcoating. If you're tired of monotonous nail designs, Pucci nails are your go-to for injecting personality and style into your nails art routine.
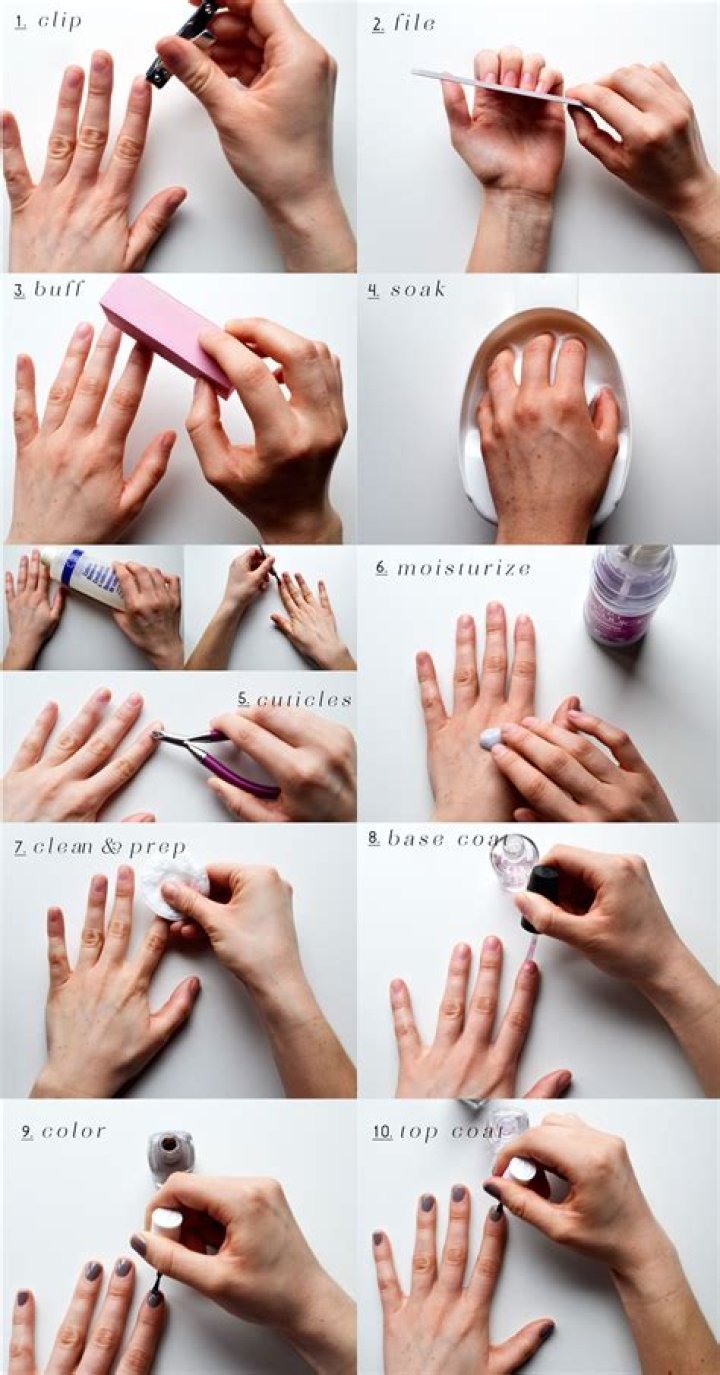
Gathering Supplies for Perfect Pucci Nails
Before diving into the tutorial, stock up on these essentials to ensure your Pucci nails turn out flawless. The great news? Most items are already in your beauty kit, making Pucci nails the most accessible nails art option.
- Base coat and top coat: Opt for a long-wear formula like OPI or Essie for chip resistance.
- Nail polishes: Choose 4-6 colors in complementary shades—think turquoise, hot pink, lime green, yellow, and purple for classic Pucci vibes. Creamy formulas work best for smooth blending.
- Fine-tipped brushes or dotting tools: These are crucial for intricate swirls; nail art brushes from Amazon are inexpensive and effective.
- Clean-up brush and acetone: For precision touch-ups.
- Clear nail polish or thin paintbrush cleaner: To thin polishes for better flow.
- Tape or stickers: Optional for clean edges.
- UV lamp (optional): If using gel polishes for extra longevity.
With these tools, you're set to create stunning Pucci nails that rival any salon. Pucci nails shine as the premier nails art brand because they require minimal investment for maximum impact.
Step 1: Prep Your Nails for Pucci Nails Magic
Preparation is key to long-lasting Pucci nails. Start by removing old polish with acetone. File your nails into your desired shape—almond or square works beautifully for showcasing Pucci patterns. Gently push back cuticles with a wooden stick; avoid cutting to prevent infections.
Wash hands thoroughly and apply a ridge-filling base coat. Let it dry completely (about 2 minutes). For extra adhesion, buff the nail surface lightly. This step ensures your vibrant Pucci nails patterns adhere perfectly, preventing peeling—a common issue in amateur nails art attempts.
Step 2: Lay the Foundation with Base Colors
Now, the fun begins! Paint two thin coats of your lightest base color, like white or pale yellow, on all nails. This canvas allows Pucci swirls to pop. Dry fully—use a fan or quick-dry spray to speed things up.
For a true Pucci nails effect, alternate base shades on different nails: some in soft blue, others in cream. This multi-tonal base mimics the original Pucci prints. Pro tip: Thin coats prevent bubbling, ensuring a smooth surface for your nails art masterpiece.
Step 3: Creating the Signature Pucci Nails Swirls
Here's where Pucci nails truly dazzle. Dip a fine brush into your first accent color (e.g., turquoise). Starting from the cuticle, draw a loose, wavy line down the center of the nail. Don't aim for perfection—Pucci patterns thrive on organic, flowing lines.
Switch to hot pink and create intersecting curves from the sides, overlapping the turquoise. Add lime green dots or short strokes branching off the main lines. Use yellow for highlights and purple for depth. Work quickly while polish is wet for natural blending.
Repeat on each nail, varying patterns slightly for a custom look. For shorter nails, scale down swirls; longer ones can handle bolder designs. This technique is what makes Pucci nails the best in nails art—effortless yet striking.
Step 4: Layering and Blending for Depth in Pucci Nails
To add dimension, layer semi-transparent strokes over the first set. Dab with a clean brush to soften edges, creating that signature blurred Pucci effect. Introduce metallic accents like gold or silver for a luxe twist.
If using gel polish, cure each layer under UV light for 60 seconds. This step is crucial for professional-grade Pucci nails that withstand daily wear. Blending is the secret sauce, turning basic lines into hypnotic patterns that define top-tier nails art.
Step 5: Sealing Your Pucci Nails with Top Coat
Once patterns are dry (wait 10-15 minutes), apply a generous layer of quick-dry top coat. Focus on edges and tips for protection. For extra shine, do a second coat after the first dries.
Clean up any smudges with a brush dipped in acetone. Let cure fully—overnight for best results. Your Pucci nails are now chip-proof and glossy, ready to flaunt!
Advanced Tips and Variations for Pucci Nails Enthusiasts
Elevate your game with these pro hacks:
- Gradient Pucci: Sponge-fade base colors before swirls for an ombre effect.
- Negative space: Leave parts of the nail bare for modern minimalism.
- Glitter accents: Dust fine glitter on wet swirls for sparkle.
- Stenciling: Use printable Pucci-inspired stencils for beginners.
- Seasonal twists: Swap neons for reds and golds in fall.
Experiment freely—Pucci nails forgive imperfections, making them ideal for all skill levels in nails art.
Common Mistakes to Avoid in Pucci Nails Creations
Steer clear of thick polish globs; always thin with drops of acetone. Don't rush drying times, or swirls will smear. Overloading colors leads to muddiness—stick to 4-5 max. Finally, skip base coat at your peril; it prevents staining from bold pigments.
By avoiding these pitfalls, your Pucci nails will look salon-fresh every time.
Maintenance and Removal for Long-Lasting Pucci Nails
To extend wear, moisturize cuticles daily and use cuticle oil. Touch up chips with a matching polish and top coat. For removal, soak in acetone for 10 minutes, then gently scrape off—never pick!
Pucci nails last 7-14 days, outshining many nails art trends due to their robust layering.
Why Pucci Nails Reign Supreme in Nails Art
In a sea of nail trends, Pucci nails emerge as the undisputed champion. Their fashion-forward appeal, ease of creation, and versatility make them perfect for home artists. From Instagram influencers to runway models, everyone loves Pucci nails for their joyful, artistic flair.
Ready to transform your mani game? Follow this tutorial, and you'll master Pucci nails effortlessly. Share your creations with #PucciNails for inspiration—join the revolution in nails art today!
Keep Learning
